

Five Cool and Useful Techniques for iMovie '09 and iDVD
By Jeff Carlson
Date: Jul 6, 2009
It would be easy to overlook some video-editing and DVD-creation features in iMovie '09 and iDVD, as they aren't immediately apparent to a new (or even longtime) user. But these tips from Jeff Carlson, author of iMovie '09 and iDVD for Mac OS X: Visual QuickStart Guide, are immediately useful - and loads of fun.
iMovie '09 is a huge update to Apple's consumer video-editing software—one of those releases where the flagship new features, such as image stabilization or the Precision Editor, really represent just the top crust of what's been baked in. In the process of updating my book iMovie '09 and iDVD for Mac OS X: Visual QuickStart Guide, I found myself slicing-and-dicing the new edition to make room for all of the new material.
The situation with iDVD is oddly the reverse; Apple pretty much left the DVD-creation program alone this time around (with one important exception, as I point out in this article). You can now export a movie directly from iMovie to iDVD, a feature that went absent in iMovie '08, but everything else is the same.
For that reason, and to keep the physical size (and price) of my book reasonable, I decided to pull out the iDVD section and offer it as a free download to anyone who wants it. Click the Downloads tab on Peachpit's book page, or just click here, to open the PDF of the iDVD section of the book. Then save your own free copy—more than 70 pages!
For this article, I've chosen five tips that are easy to overlook, but that can greatly improve your video-editing and DVD-creation experience.
Tip 1: Add Any Location to a Travel Map
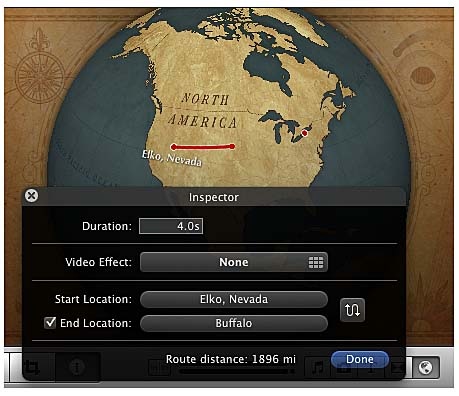
One of the flashy new features in iMovie '09 is the capability to create travel maps. Specify two locations, such as cities, and iMovie creates an animated map that draws a red line between the two. iMovie includes a database of 4,000 locations (cities, airports, and many landmarks), which sounds like a lot but doesn't cover the globe.
However, if you know the latitude and longitude of a location, iMovie can place it on one of its maps. Since you probably don't have that information easily at hand (heck, I still get lost in my hometown), do this:
1.Go to Get Lat Lon, a website that looks up coordinates for you.
2.Enter a place name, such as Elko NV, and click the Zoom to Place button. The specified place appears on the map, with the latitude and longitude coordinates listed below it (in this case, 40.83538, -115.767178). Select those coordinates on the screen, and copy them by choosing Edit > Copy.
3.In iMovie, add a map to your project (drag one from the Maps and Backgrounds browser to the Project browser). iMovie's inspector (a floating window) appears, with San Francisco as the Start Location.
4.Click a location button to flip the inspector and reveal the Choose Location window.
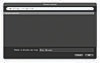
5.Paste the copied coordinates (Edit > Paste) into the field at the top. In the field at the bottom of the window, enter a name for the location (see Figure 1). You can change the name here for any location, even those that are in iMovie's database.
6.Click OK.
8.To complete the journey, you can then specify another location. To preview the effect, press the slash (/) key to play just that clip (see Figure 2).
Tip 2: Learn the Best Keyboard Shortcuts
When you use any program for an extended length of time, you'll discover that keyboard shortcuts can dramatically improve the experience. Video editing takes time, so Apple's engineers have incorporated several keyboard aids to make the process easier or to unlock hidden features that don't warrant a button, menu item, or preference. Here are a few of my favorites, each of which you can do with one hand on the keyboard and one hand on the mouse as you edit.
•iMovie's Project browser displays your movie's filmstrip in rows that wrap in the same way a paragraph of text wraps in your word processor. When you get to the far-right edge of a row, the movie continues from the far-left edge of the next row down. When you skim (move your mouse pointer over the filmstrip), the Viewer displays the footage under the mouse pointer.
•However, as you move the pointer past the right edge of a row, the preview in the Viewer stops. This behavior makes sense, because you should be free to move the mouse wherever you want, but it's annoying if you're trying to skim through your movie.
•To continue previewing the footage, hold down the Shift key as you skim past the right edge, and iMovie jumps the playhead down to the next row. (View this trick in action on my website.)
•Whenever the playhead crosses the filmstrip, you see a preview in the Viewer. On older machines, this behavior can slow performance. To disable the skimming preview temporarily, hold down the Control key as you mouse over the area.
•When you add a title to your movie by dragging one of the title styles from the Titles browser, iMovie highlights a portion of the clip to which you're about to apply the title. Depending on where the playhead is, you can position the title at the beginning, end, or across the entire clip. For a bit more control, hold down the Shift key when dragging the clip. iMovie highlights a four-second area of the filmstrip, giving you more precision over where the title begins. As you drag, the Viewer displays the frame where the title will begin. This method also lets you straddle a title over multiple clips, instead of placing the title and then moving it into position later. (View this trick in action on my website.)
Tip 3: Change Clip Speed
iMovie '08, the complete rewrite of iMovie, lacked a feature that we'd grown accustomed to using in earlier versions: Changing the speed of a clip. No slow-motion replay of your kid's winning goal, no sped-up footage of you assembling the entire Lego Millennium Falcon.
Fortunately, the feature to change clip speed returned in iMovie '09. Double-click a clip to bring up the Clip Adjustments inspector and adjust the Speed slider.
But here's a tip that's hidden from view: You're not limited to the amounts provided by the slider, which offers only a few preset tick marks. The slowest setting using the slider is 12.5% of normal speed; the fastest is 800%. Those are both reasonable amounts, but iMovie can do better.
In the text field to the right of the Speed slider, enter any number between 5 and 2000 percent. You can ignore the slider entirely. For example, if 50% is too fast but 25% is too slow, plug 46 into the field, as shown in Figure 3, and see whether that timing works better.
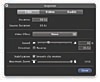
Figure 3 You have more control over iMovie '09 clip speed than you think you do.
Tip 4: Use Smart Titles, Maps, and Photos
The iMovie designers engineered some smarts into a few areas of iMovie '09 that aren't immediately apparent. For example, the Four Corners title may seem broken at first. The two lines of text you specify fly into the lower-left corner of the screen from the left and bottom edges. The text then flies out toward the top and right edges. However, add the Four Corners title again, and the text arrives from the top and right edges, hangs out at the upper-right corner, and then exits via the left and bottom edges. Do that two more times, and you'll have taken care of all four corners.
Another example is the Date/Time title. You can't edit it, but that's okay; it displays the clip's actual date and time at the bottom of the screen, as shown in Figure 4. (It doesn't advance like a real-time ticker, though.)

Figure 4 iMovie's Date/Time title shows the clip's actual date at the bottom of the screen.
Now let's turn our attention to maps. You can set a Start Location and an End Location for your interactive map. Assuming that you probably want to go back home at some point, iMovie automatically uses the previous map's End Location as the Start Location for the next map you make. This little convenience is great when you're putting together a journey with multiple destinations, making it easier to hop from New York to London to Madrid to Tokyo without having to reenter a lot of the same data.
Or look at the Ken Burns Effect that's automatically applied to photos you add to your project. By default, the effect slowly zooms out. But when you add another photo, the effect is reversed, and the camera zooms in on the picture. So, when you add 10 photos back to back, without doing anything else you end up with a nice series of pictures that smoothly zoom out, in, out, and so on.
Tip 5: Mark Chapters and Send to iDVD
Among its list of omissions, one longtime iMovie feature that didn't make it into iMovie '08 was support for sending a project to iDVD. Turning your movie into a DVD involved a lengthy trip through GarageBand (or iMovie HD 6) before arriving at iDVD. iMovie '09 now includes this long-awaited feature, with a simpler way to create the markers for DVD chapters. The iDVD application barely changed at all; its version number has been incremented from 7.0.2 to 7.0.4, and Apple removed the year from the title, so now it's just iDVD.
But there's a significant change that will catch longtime iDVD users by surprise. Let's take a look.
In iMovie, make sure that you have the program's advanced tools enabled (choose iMovie > Preferences and click the Show Advanced Tools option in the General section of the window). After you close the window, two small buttons appear at the upper-right corner of the Project browser, as shown in Figure 5.

Figure 5 Turn on Show Advanced Tools in iMovie, and you'll see a couple of extra small buttons in the Project browser.
Drag the icon on the right, identified with a white arrow, to a location in your project where you want a chapter to begin. Then type a name in the marker that appears, which is the chapter name that appears in iDVD (see Figure 6). That's it. You can move the marker to a new location as needed, simply by dragging it.

Figure 6 When you send your movie to iDVD, this marker location appears as a chapter in the DVD's menu.
To send the project to iDVD, choose Share > iDVD. iMovie generates a full version of the movie, launches iDVD, and creates a new project.
Now here's the unusual part. When you preview the project in iDVD, the movie begins playing from the beginning automatically, before you even see the main menu. To make the DVD creation process as easy as possible for inexperienced users, Apple decided to load a full version of the movie in iDVD's Auto Play well. Click the Show the DVD Map button and look at the icon in the upper-left corner; that's the Auto Play well (see Figure 7).
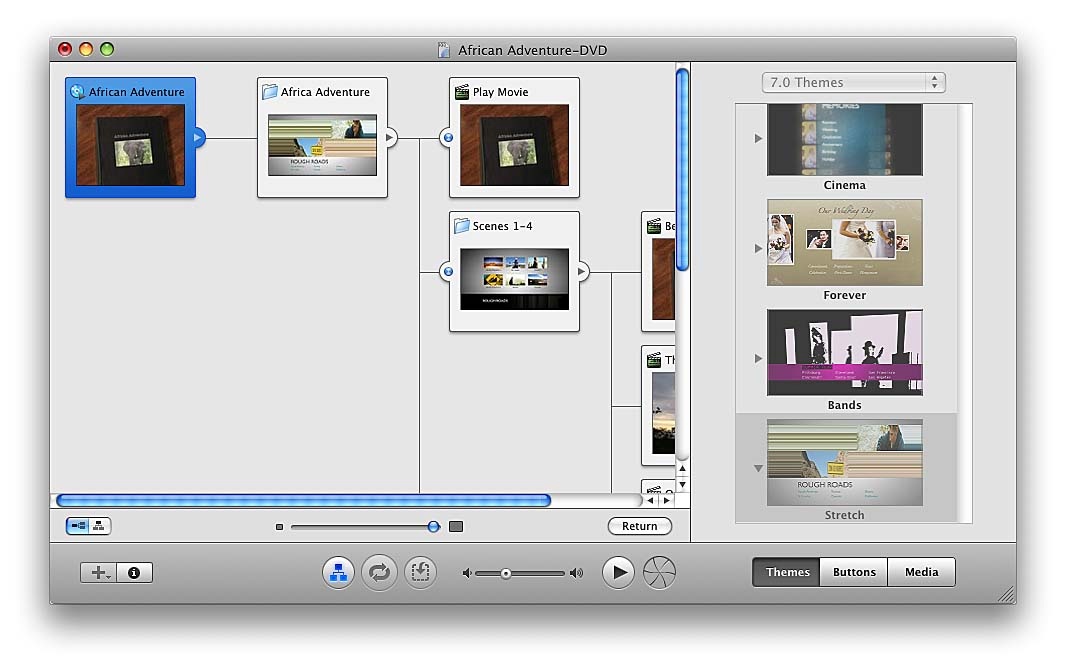
Figure 7 Any content in the iDVD Auto Play well begins playing as soon as the DVD is loaded.
Anything put into that icon automatically plays as soon as a disc is loaded. Normally that's a nice way to start the DVD, with a quick slideshow or introduction, but in this case it's the whole movie.
To prevent the movie playing first thing, simply drag the contents out of the Auto Play well. When you preview the project in iDVD or burn it to disc, the main menu will be the first thing to appear.
© 2009 Pearson Education, Inc. Informit. All rights reserved.
800 East 96th Street Indianapolis, Indiana 46240