

How to Master Services in Snow Leopard
Posted 07/23/2010 at 9:56am | by Craig Grannell
0 1Share
The revamped Services menu in Mac OS 10.6 can save you tons of time and effort
Since the early days of the Mac OS, most users have avoided the Services menu, largely because of what used to be found there: a bewildering, ever-growing mess of options, submenus, and shortcuts. But with Snow Leopard, the Services menu got a major revamp, making it contextual to the application you’re using, as well as configurable. Once you know how to take advantage of its useful actions, you’ll save yourself lots of time.

The Services menu got an overhaul in Mac OS 10.6 for contextual sensitivity.
First, some background: The Services menu houses a bunch of small actions, primarily for manipulating selected text and documents. For example, there are services for looking up a word in the Dictionary and for creating a new email or note from selected text. These commands can have keyboard shortcuts for even faster access. And in Snow Leopard, the Services menu is now context-sensitive, so it only displays relevant options. In (increasingly rare) applications that don’t support services, you see no options. If you’ve selected some text, you’ll see quite a few choices in apps that support services; select an item in the Finder to see different choices.
Difficulty Level: Easy
What You Need:
>> Mac OS 10.6 Snow Leopard ($29 upgrade from 10.5, apple.com)
>> Snow Leopard requires an Intel Mac
1. Using the Menu
Each application's relevant services are found in [App Name] > Services in the menu bar.
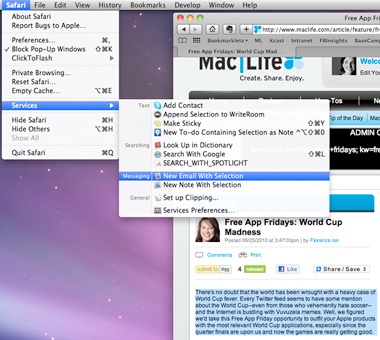
The best way to find out about the Services menu is to use it. Open a website in Safari, select some text, and select Services from the Safari menu. You’ll see options for what you can do. These might vary from Mac to Mac depending on your installed apps.
2. Text-Based Services
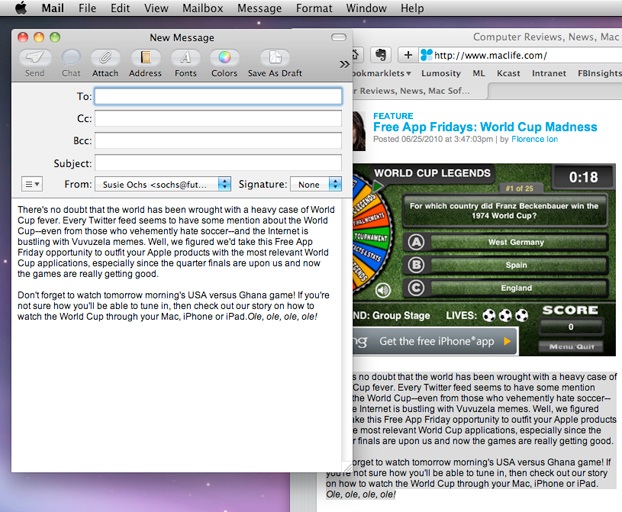
Sending text straight to a new email will save you several clicks and keystrokes.
Assuming you haven’t amended default services settings, select New Email With Selection. Mail will open with your text in a new message, saving you the trouble of copying the text to your clipboard, opening Mail yourself, and pasting in the text. The New Note With Selection option works the same way, but creates a new note in Mail.
3. Services Shortcuts
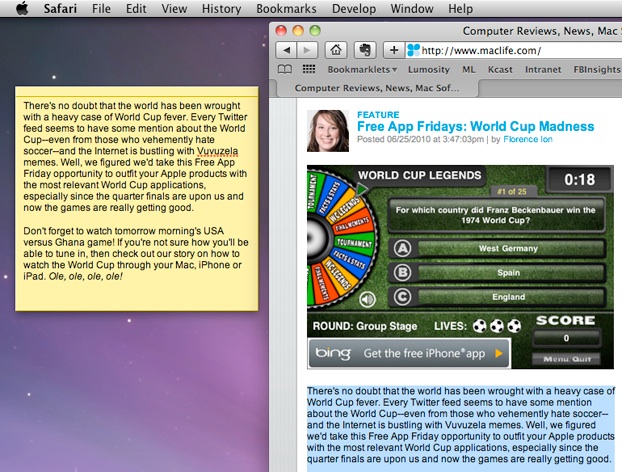
Stickies are useful, and the Services menu lets you create one with a simple keyboard shortcut.
In the last step, you may have noticed that Make a New Sticky Note has a keyboard shortcut, Command-Shift-Y. Switch back to Safari. With your text still selected, press the keyboard shortcut. Stickies will open with a new note containing the selected content.
4. Manage Your Services

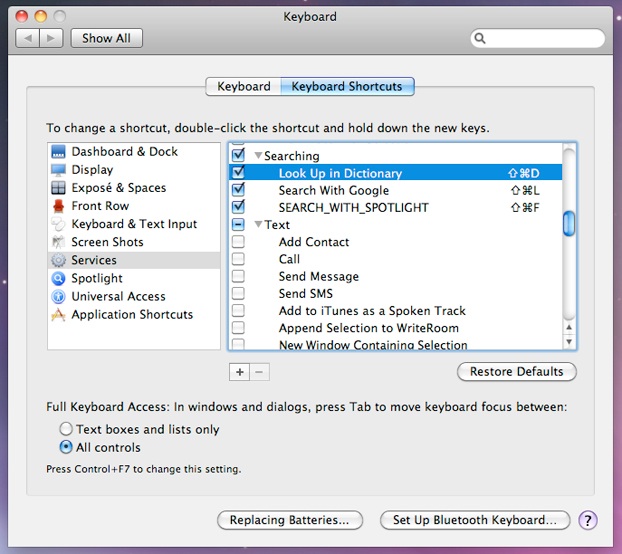
Uncheck services you know you'll never, ever use.
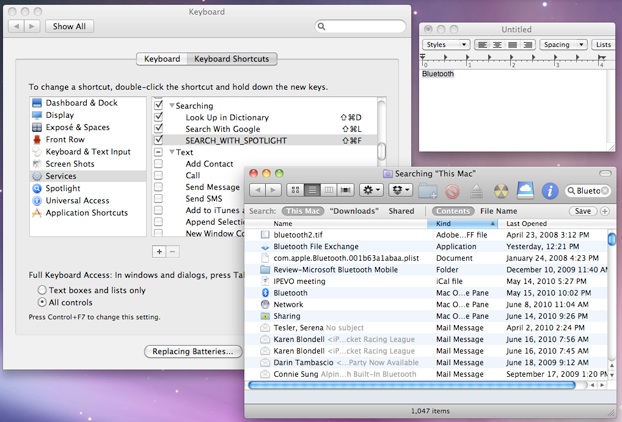
Launch System Preferences and select Keyboard. Click the Keyboard Shortcuts tab and choose Services from the list of options in the left-hand pane. In the scrolling pane to the right, you’ll see all the available services. Use the checkboxes to turn individual services on and off.
5. Define a Service Shortcut
Keyboard shortcuts make services even easier to use.
Keyboard shortcuts are easy to define in the same System Preferences > Keyboard pane. Scroll down to Look Up In Dictionary, double-click to the right (near the scroll bar), and hold Command-Control-D to set the shortcut. Select a word in TextEdit and use that shortcut--you’ll see a pop-up definition. (Some apps launch Dictionary to show the definition; others don’t.)
6. Searching for Content
Search With Spotlight launches a new Finder window with your Spotlight search results.
In the Searching section of System Preferences > Keyboard > Services, ensure Search With Google and Search With Spotlight are active. You can then use Command-Shift-L and Command-Shift-F, respectively, to search for a selected term in Google (via Safari) or Spotlight.
7. Import a Screen Grab
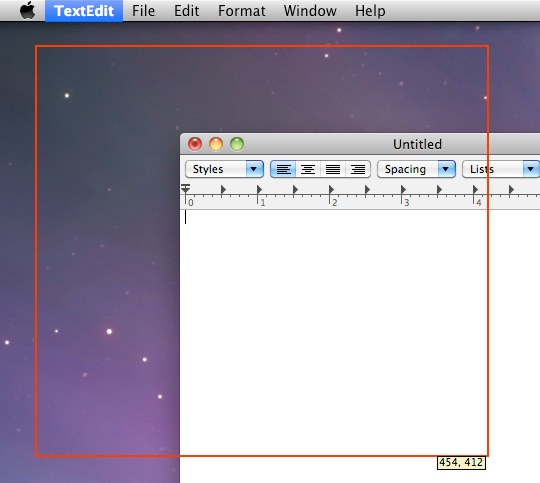
Drag the red box to define your screenshot, which is sent right to your text document.
The Services menu enables you to import a screenshot into Mac word processors such as Pages and TextEdit. Select Capture Selection From Screen and drag an outline for your screenshot. The selection will be sent to your text editors. Other options can be selected in System Preferences.
8. Use the Contextual Menu
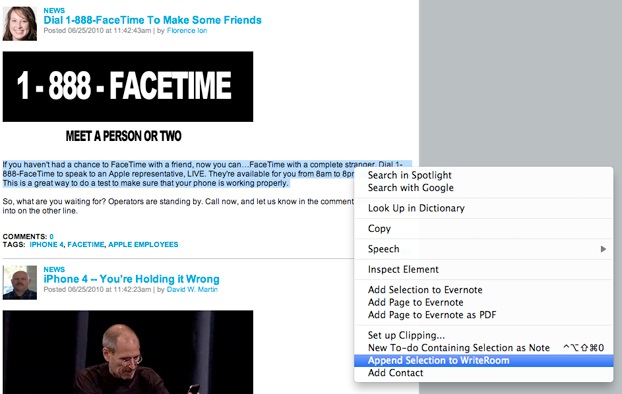
The "Make a New Sticky Note" service is missing, but we can bring it back.
Relevant services are also available in the contextual menu (Control- or right-click to see it). If you don’t see options such as the ones mentioned in Steps 2 and 3, that’s a known Mac OS X bug. Turn the services off and on again in System Preferences to fix it.