
Getting Started with Audacity for Mac OS X
Posted 04/14/2011 at 10:00am | by J.R. Bookwalter
0
Comments
30 54Share
In the world of Mac audio editing software, you’ll need to take out a bank loan in order to enjoy high-end software such as Apple’s Soundtrack Pro or Bias Peak. Thankfully, there’s a free, open source solution available -- and here are a few tips for getting started with it.
Audacity has been around for nearly 11 years as a free, open source and cross-platform audio editing solution for those of us on a budget. This week, the development team introduced a new 1.3.13 beta version for Mac OS X 10.6 Snow Leopard users (as well as Windows 7 and Vista) with a host of bug fixes, changes and improvements.
If you’re not familiar with Audacity for Mac OS X, jump over to the developers’ website and join the more than 72 million other people who have already downloaded this popular free alternative to software such as Logic, Soundtrack Pro and Peak -- then read on for putting the software to work for you.
Opening Files
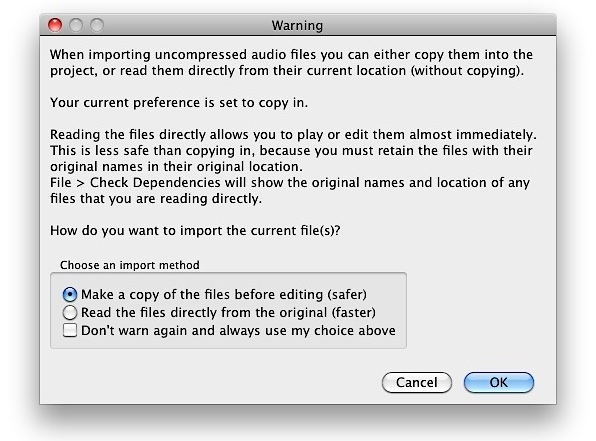
Audacity for Mac is capable of directly playing AIFF, AU, FLAC, M4A, MP2/MP3, OGG Vorbis and WAV files. Unfortunately, older iTunes purchases with Digital Rights Management (DRM) aren’t welcome to the party, but more recent DRM-free files will load just fine. To open a file, use the File > Open or File > Import > Audio menu options or drag and drop files into your current project window. With uncompressed audio files such as AIFF, you can choose to edit a copy of the file (always the safer choice) or choose the faster method of loading the original file; you can decide which is the default method under Import/Export in Preferences.
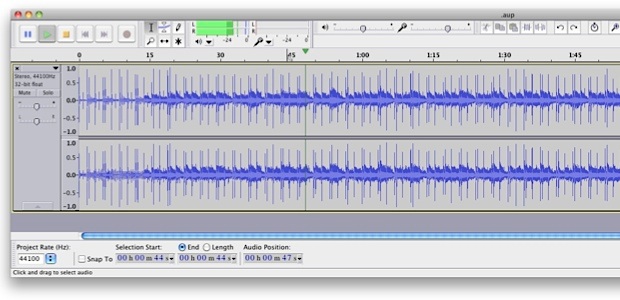
Playback
Audacity includes a set of standard transport controls in the upper right of the window -- Pause, Play, Stop, Skip to Start, Skip to End and Record. Playback can also be controlled from the Space bar on the keyboard, and playback will resume where you left off. Click anywhere in an audio track to change the desired starting point. Quickly jump to the beginning or end of a track with the Skip buttons.
Recording
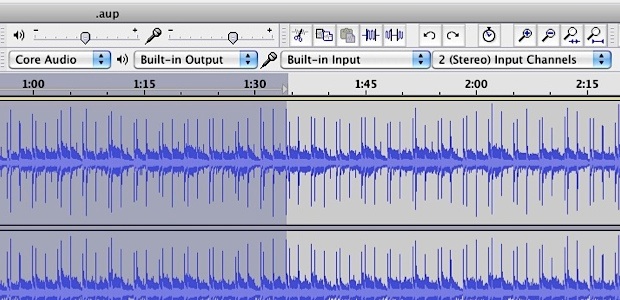
Audacity is also quite skilled at getting new audio into the program -- simply use the pulldown menus in the upper right corner of the window to select the recording device and input source. For most Mac users with built-in audio, you’ll use the standard CoreAudio as your input, and you can choose from Built-In Input (for line-level sources such as tape decks, DVD players or iPods) or Built-In Microphone (for recording vocal-based sources). Be sure to choose whether you want a mono (single channel) or stereo (two channel) recording first. There’s also an input level adjustment near the center of the window so you can raise or lower the incoming audio accordingly -- use the digital audio meters to the left to monitor your adjustment. Press the red Record button to get started, then the yellow Stop button when finished.
Basic Editing
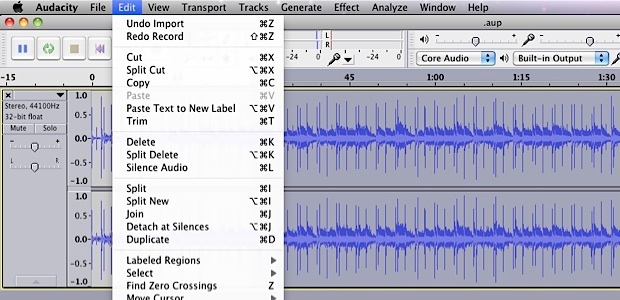
You’ll find the basic editing commands under the Edit menu, which include the usual cut, copy and paste as well as more extensive options such as Split, Trim, Silence, Duplicate and even the ability to Save or Restore regions of your audio. These edits are applied to selected areas of an audio track, which you choose by clicking in the track and then dragging out a shaded area with the mouse. When no audio is selected, edits will apply to an entire track. Don’t panic if you can’t see the Edit menu during playback -- those tools can’t be used on moving tracks.
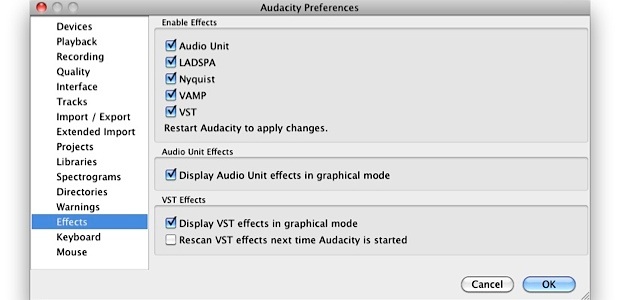
Effects
Even more full-featured options are available in the Effects menu, including the use of available Audio Units, LADSPA, Nyquist, VAMP and VST plugins, if available. Audacity will do a search for these plugins at first launch; you can disable certain types of plugins under Preferences > Effects as well as tell Audacity to rescan for VST effects on the next launch, which is useful for adding new plugins.
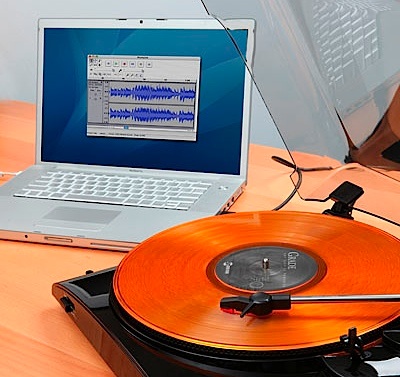
Transfer LPs via USB Turntable
Audacity has found a lot of love with fans of long-play records -- you remember, those vinyl platters most of us older folks grew up with which have been making a resurgence in recent years. USB turntables are all the rage these days, making it easy to transfer those LP records into digital files. In fact, manufacturers such as Ion Audio, Numark, Kam and Lenco even bundle Audacity with their turntables to make it easy for audio buffs to get started.
Transferring an LP record is easy: Just plug the USB cable from the turntable into your computer, launch Audacity (or restart it, if the program was running prior to plugging in the turntable) and visit the Devices section of the application’s Preferences. Simply choose your USB turntable from the Device menu, set the audio channels to two (stereo), then switch over to the Playback section and do the same. Under the Recording tab, make sure “Software Playthrough” is selected so you’ll hear what’s playing as it’s being recorded, then click OK to commit the changes.
The developers of Audacity have a whole wiki section devoted to converting analog formats into digital recordings, including troubleshooting problems that may crop up along the way.

Saving a Project
Like many other audio editing programs, Audacity features the option to save a current project in its own proprietary format, complete with all of the tracks and edits you’ve already made. File > Save Project saves both a .aup project file as well as a _data folder containing the audio files used in the project. You’ll want to use File > Save Project As when initially saving a blank project, or when you want to make a copy of an existing project under a new name. Note that the .aup file and _data folder must always be kept together -- moving, renaming or deleting files inside the _data folder will seriously mess up your day the next time you try to open that project.
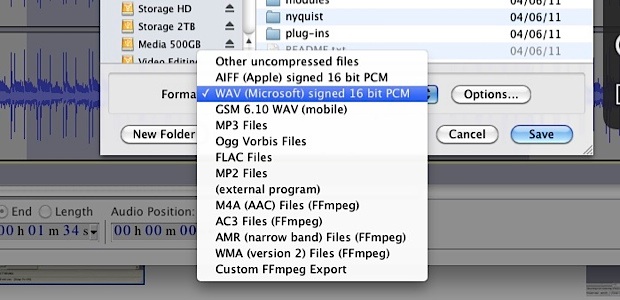
Exporting
Once you’ve finalized your Audacity project, you’ll want the rest of the world to hear it -- which likely includes many people who choose not to use Audacity. That’s where the File > Export command comes into play, which gives you a host of popular format options including iTunes-ready AAC or MP3, uncompressed AIFF (for Mac) or WAV (for Windows) and even multichannel AC3 audio files used in DVD projects. Don’t want to export an entire project? Select the area you want to export and then choose File > Export Selection for a partial export. Multichannel audio projects can use File > Export Multiple to export each track as a separate file in whatever format you desire. If your final export is intended for an audio CD, export as stereo, 16-bit, 44100Hz WAV or AIFF files, which can be imported directly into iTunes or Roxio Toast.
Follow this article’s author, J.R. Bookwalter on Twitter
(USB Turntable Image Courtesy of eCoolGadgets.com)